Performing Molecular Dynamics#
In this tutorial we will cover:
how we can use BuildAMol when we want to do MD simulations
Investigating the dynamics of molecular structures is done in many different fields of research, from microbiology to pharmacology, to material sciences. If we already have a structure to go on then we can use tools like VMD, CHARMM, or AMBER to perform molecular dynamics (MD) simulations. If we do not have a structure available we need to build it first - which is where BuildAMol comes in!
We can build a molecule of interest and then export it as a Mol file (or other format) for use with the respective MD software of choice. In this tutorial we showcase the entire workflow of building a molecule (in BuildAMol), parametrizing the molecule (CHARMM-GUI), and running an MD simulation (OpenMM)…
[7]:
import plotly
plotly.offline.init_notebook_mode()
Let’s start by making some molecule that we can study…
[ ]:
import buildamol as bam

bam.load_small_molecules()

benzene = bam.get_compound("benzene")
amine = bam.get_compound("dimethylamine")

amine.autolabel()
benzene.autolabel()
[69]:
# make a molecule
# (btw. if you are unfamiliar with the % and @ syntax, check out the syntax-tutorial)
link = bam.linkage(None, "C1")
mol = benzene.copy()
for C in benzene.get_atoms(1, 3, 5):
link.atom1 = C
mol = mol % link @ 1 + amine
link.atom1 = link.atom2 = "C2"
mol2 = mol.copy()
for amine_residue in mol.get_residues("DMN"):
mol = mol % link @ amine_residue.serial_number + mol2.copy() @ 2
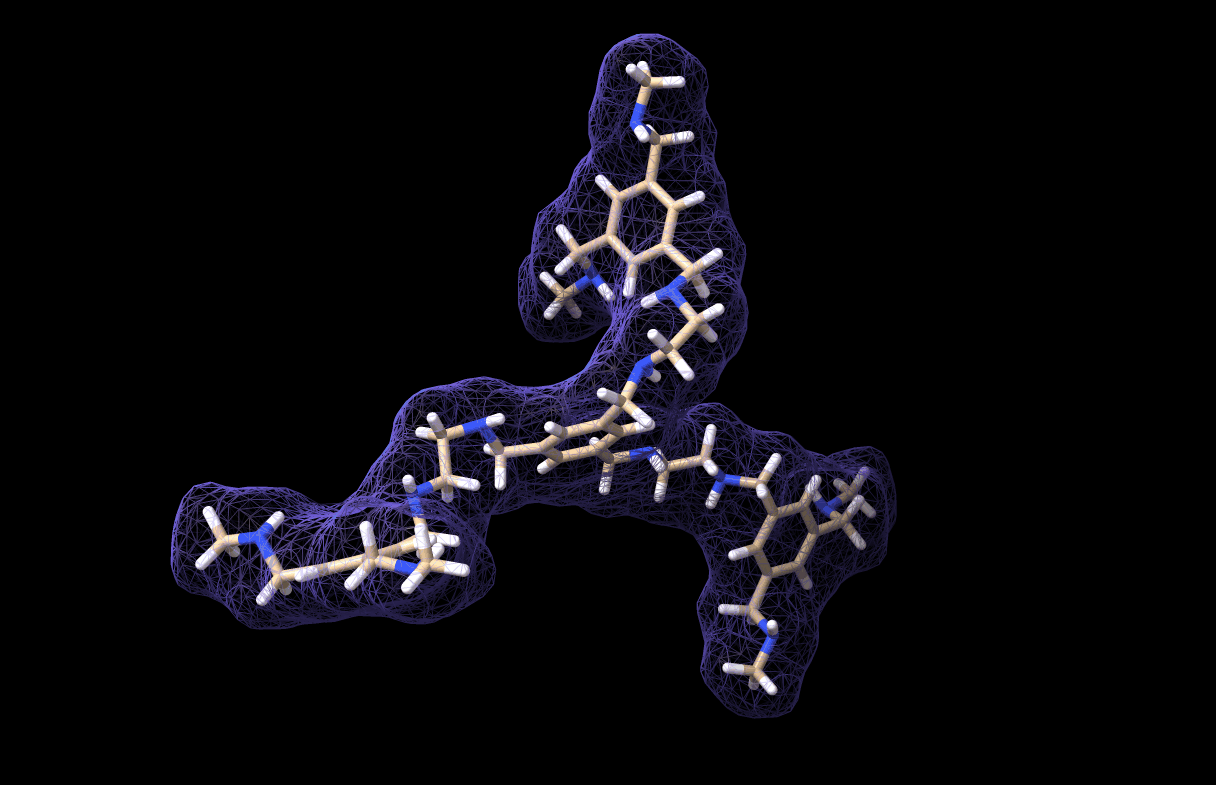
mol.optimize()
mol.show()
/Users/noahhk/anaconda3/envs/glyco2/lib/python3.11/site-packages/plotly/express/_core.py:1985: FutureWarning:

When grouping with a length-1 list-like, you will need to pass a length-1 tuple to get_group in a future version of pandas. Pass `(name,)` instead of `name` to silence this warning.
At this point we leave the python sphere for a moment to parametrize our molecule. We are free to use any software tool to parametrize our molecule, but I find the webserver of CHARMM-GUI.org just too useful because of their CGenFF installation, so let’s simply pass our molecule to their web-service to get a CHARMM Parameter, Topology, and Protein Structure File. If you have the necessary software installed on your machine, feel free to use that instead, of course… Or use any other library that you like to parametrize your molecule.
[ ]:
# let's export our molecule as a Molfile to use with CHARMM-GUI's Ligand Reader & Modeler
mol.to_molfile("./files/molecule.mol") # -> now go to https://www.charmm-gui.org/?doc=input/ligandrm
Once we have all the output files from CHARMM-GUI, we can use these in OpenMM to perform our simulation. The remainder of the code has nothing to do with BuildAMol anymore. It’s now on to OpenMM coding!
[72]:
import openmm
import openmm.app as app
import openmm.unit as unit
We need to get our parametrized molecules loaded into OpenMM. In our case we have uses CHARMM-GUI’s webserver to parametrize our molecule, so we need to load these files into OpenMM. To do so, we can do something like this:
[87]:
from pathlib import Path
charmm_downloads = Path("./files/charmm-gui-download")
[88]:
# load the pdb of our molecule (it will be named "ligandrm.pdb" by CHARMM-GUI)
pdb = app.PDBFile(str(charmm_downloads / "ligandrm.pdb"))

# load the psf of our molecule (it will be named "ligandrm.psf" by CHARMM-GUI)
psf = app.CharmmPsfFile(str(charmm_downloads / "ligandrm.psf"))

# load the CHARMM force field parameters (I named the parametrized files "mol.prm" and "mol.rtf" in CHARMM-GUI)
# we need to include the CGenFF parameters as well...
params = app.CharmmParameterSet(
                                str(charmm_downloads / "toppar" / "mol.rtf"),
                                str(charmm_downloads / "toppar" / "mol.prm"),
                                str(charmm_downloads / "toppar" / "top_all36_cgenff.rtf"),
                                str(charmm_downloads / "toppar" / "par_all36_cgenff.prm"),
                            )

# create the OpenMM system from the PSF and parameters
# that we will need to run the simulation
system = psf.createSystem(params,
                        nonbondedMethod=app.CutoffNonPeriodic,
                        nonbondedCutoff=1.0*unit.nanometer,
                        constraints=app.HBonds,
                        implicitSolvent=app.GBn2
                        )
[90]:
# now set up some other simulation stuff that is necessary...
integrator = openmm.LangevinIntegrator(300*unit.kelvin, 1/unit.picosecond, 0.002*unit.picoseconds)
simulation = app.Simulation(psf.topology, system, integrator)
simulation.context.setPositions(pdb.positions)

# and run the simulation
simulation.reporters.append(app.PDBReporter('files/molecule_MD.pdb', 10))
simulation.reporters.append(app.StateDataReporter('files/molecule_MD.log', 10, step=True, potentialEnergy=True, temperature=True))
simulation.step(1000)
And thus we made a simulation for our very own custom molecule, which is saved in molecule_MD.pdb. It looks like this, by the way:
And with that we have reached the end of this tutorial! As you can see, the workflow is not very comlicated. In fact, the most critical part is parametrizing the custom molecule. Actually, this is not trivial at all. I tried at first with a bunch of quickly-installed python libraries for parametrization but I could not get any of them to work, so I chose the easy-way-out by using CHARMM-GUI… However, if you have a working parametrization software on your local machine then so much the better!
Good luck with your MD-project!