Automated Ligand Design Pipeline#
In this tutorial we will cover:
how we can use BuildAMol to randomly assemble fragments from a library into larger molecules
how we can use BuildAMol in an automated ligand design framework
Automated design for protein ligands is a very active field of research. Many dedicated software solutions exist, leveraging machine learning, deep learning, fragment-based assembly, graph-based, SMILES-based, diffusion-based, and all kinds of techniques in order to produce structures of small molecules that hopefully bind a specific protein target.
BuildAmol can be used in automated setups to generate molecules. However, it is not designed to perform any kind of analysis on proteins and alike. In this tutorial we will develop a pipeline that will use BuildAmol to generate molecular candidate structures and then forwards these to the library dockstring[dockstring/dockstring] which will evaluate the docking potential of a given candidate. Using these two primary tools we will make a simple ligand-design
system.
As a disclaimer at the start, this tutorial does not produce a fully-fledged production ready ligand-design tool! It merely provides some insight and inspiration of how one might use BuildAMol in such a context! Nothing that we will be developing in this tutorial is extensively tested or optimized for performance, so keep this in mind while following along. Actually, since dockstring only works with SMILES the whole code will technically perform a bunch of conversions back-and-forth that would be totally unnecessary, but that’s just a side note…
[1]:
import buildamol as bam
import numpy as np
Getting a fragment library#
Ligands are assembled from fragments such as individual benzene rings or ethanol in hopes of finding a combination of fragments that will suite the requirements. In this tutorial we will load a fragment library that was prepared in BuildAMol before. If you are curious how that was done, check out the “Fragment Library” tutorial in the documentation!
[2]:
library = bam.read_compounds("./files/fragments.json")
len(library)
[2]:
201
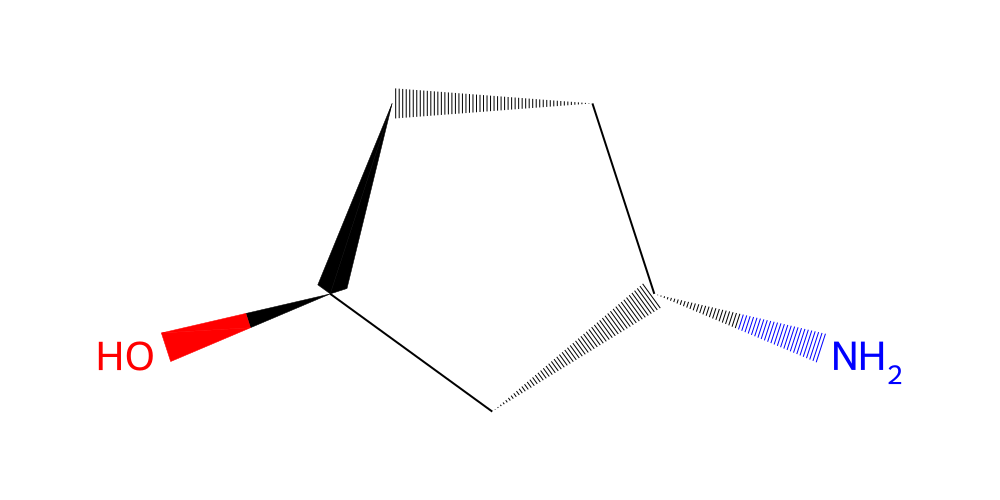
Great! So we have loaded a small fragment library of 96 fragments. Let’s look at one of them:
[3]:
library.get(list(library.ids)[20]).chem2dview().draw()
[3]:
Making molecules from fragments#
Now that we have a bunch of fragments to work with we can start thinking about how to combine them into ligands. For this purpose, let’s define a class called the MoleculeSampler. This class will keep track of the fragment database and will be able to assemble a molecule from a numerical array input. Why do we need an array input? Well, machine learning works with numerical data. If we want to use any kind of automated optimization algorithm we will need to find a way of “encoding” our
ligand molecules into an array with some numbers.
Encoding “instructions” to build a molecule in numpy#
The most important first decision we need to make is how to encode our molecules of interest into numpy arrays. We cannot directly use atom coordinates because we don’t know what atoms the ligands will include or how many atoms are in each fragment. What we can know, however, is which fragments to attach to each other. We can also know which atoms to use when attaching different fragments. How do we “encode” this kind of data? Here’s one possibility:
[incoming_fragment_global_index, incoming_atom_index, target_fragment_atom]
We can use the indices of fragments within our database to identify fragments and we can use indices for each fragment to identify the atoms that should be used for connecting different fragments. In this case we make the simple assumption that each fragment will always be connected to the previous fragment. So the second fragment attaches to the first, the third to the second, and so on…
Let’s look at an example:
array([[159,  -1,  -1],
       [128,   4,   5],
       [195,   1,   1]])
The matrix above states the following: “Start with the fragment nr. 159 in the database (first line, the rest of the line can be ignored). Then get the next fragment, which is nr. 128 in the database, and connect it via its fifth atom to the first fragment in the molecule via its sixth atom (remember that indices start at 0, so index 4 = entry 5). Finally, get the last fragment, which is nr. 195 in the database, and connect it via its second atom to the second fragment again via its second atom.” Sounds bulky, right? Maybe it will be a bit clearer when we implement the whole system in code…
[4]:
class MoleculeSampler:
    def __init__(self, fragments: list):

        # we need to maintain a per-fragment database of possible atom-sites where another fragment can be attached
        # we also need to maintain a per-fragment database of atom-ids to make linkages
        attachment_points = []
        atom_ids = []

        # let's browse through all fragments and identify the attachment points
        # also, filter out any fragments without any attachment points (good practice)
        to_drop = []
        for fdx, fragment in enumerate(fragments):

            # we define all non-Hydrogen atoms as potential attachment points
            # but only those that have a hydrogen neighbor that can be removed
            # will be considered as attachment points
            n_atoms = sum(1 for i in fragment.get_atoms() if i.element != "H")
            a = []
            for adx, atom in enumerate(fragment.get_atoms()):
                if atom.element == "H":
                    continue
                if fragment.get_hydrogen(atom):
                    a.append(adx)
            if len(a) == 0:
                to_drop.append(fdx)
                continue
            attachment_points.append(a)
            atom_ids.append([atom.id for atom in fragment.get_atoms()])

        for fragment in to_drop:
            del fragments[fragment]

        self.fragments = fragments
        self.attachment_points = attachment_points
        self.atom_ids = atom_ids


    def random(self, n_fragments: int):
        """
        Make a random matrix encoding for a molecule assembled from fragments.
        """
        # we could literally just use a single line here of np.random here, but then we run the risk of
        # making invalid matrices where attachment_points are referenced more than once so we make a more intricate
        # method here to ensure our "random" matrices are valid

        matrix = np.full((n_fragments, 3), -1, dtype=int)
        matrix[0, 0] = np.random.choice(len(self.fragments))

        # we maintain a chache to keep track over which attachment points have been used already
        # on which fragments
        _used_atoms = {i : set() for i in range(n_fragments)}
        for i in range(1, n_fragments):

            # choose an incoming fragment from the database
            matrix[i, 0] = np.random.choice(len(self.fragments))

            # choose an attachment point on the incoming fragment that was not used already
            while matrix[i, 1] == -1:
                atom = np.random.choice(self.attachment_points[matrix[i, 0]])
                if atom not in _used_atoms[i]:
                    matrix[i, 1] = atom
                    _used_atoms[i].add(atom)

            # choose a target fragment in the molecule
            # and choose an attachment point in the target that was not used already
            target = i-1
            while matrix[i, 2] == -1:
                available = [i for i in self.attachment_points[matrix[target, 0]] if i not in _used_atoms[target]]
                if len(available) > 0:
                    matrix[i, 2] = np.random.choice(available)
                    _used_atoms[target].add(matrix[i, 2])

        return matrix

    def make_molecule(self, matrix):
        """
        Assemble a molecule based on an instruction matrix
        """
        _used_atoms = {i : set() for i in range(len(matrix))}

        # we start by copying the first fragment
        mol = self.fragments[matrix[0, 0]].copy()

        # we then attach all other fragments
        for i in range(1, len(matrix)):
            source, source_atom, target_atom = matrix[i, :]
            target = i-1
            # sanity checking to ensure we are not trying to attach to the same atom twice
            if target_atom in _used_atoms[target]:
                raise ValueError("Target atom already used")
            if source_atom in _used_atoms[i]:
                raise ValueError("Source atom already used")

            # make a linkage and attach the fragment
            link = bam.linkage(self.atom_ids[matrix[target, 0]][target_atom], self.atom_ids[source][source_atom])
            mol.attach(self.fragments[source], link, at_residue=int(target+1))

            _used_atoms[target].add(target_atom)
            _used_atoms[i].add(source_atom)

        return mol
Okey, so that’s done. It is a bit of a clunk but it should do the trick. Let’s test out what our example array from above actually yields:
[5]:
# make a sampler with our fragment library
sampler = MoleculeSampler([library.get(i) for i in library.ids])

# make the matrix from the example above
matrix = np.array([
       [159,  -1,  -1],
       [128,   4,   5],
       [195,   1,   1]])

# and make the molecule
mol = sampler.make_molecule(matrix)
mol.chem2dview().draw()
[5]:
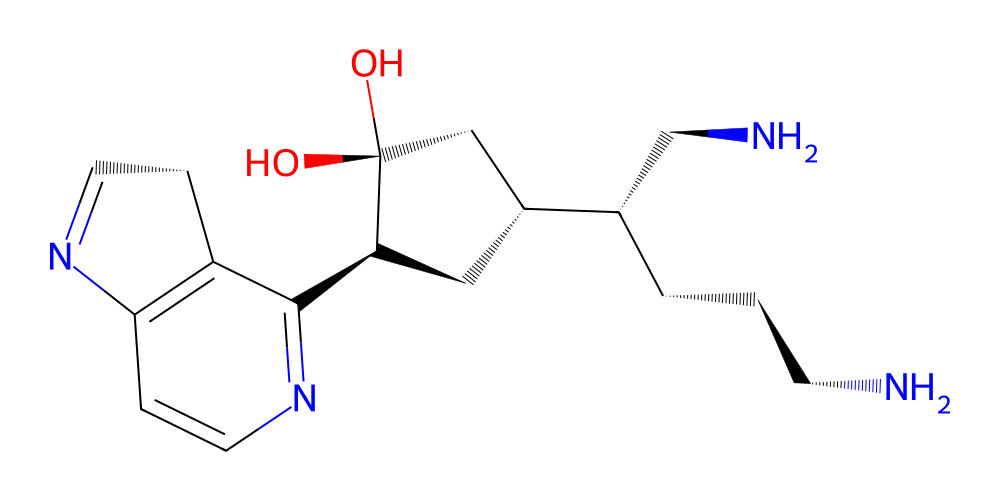
Cool! So apparently we can make molecules from numpy arrays now! With that taken care of we can start thinking about or actual goal of finding ligand generation.
The docking procedure#
We will use dockstring which is a library that works with RDKit, Openbabel, and Autodock Vina to dock a molecule onto a protein. The system is relatively simple. One loads a protein target and then passes SMILES for the possible ligand to the Target.dock method, which will return a docking score. Regrettably, we cannot directly pass an RDKit molecule to dockstring so there will be a lot of back-and-forth computation going on but that can’t be helped right now…
[6]:
import dockstring as ds

# we will work with the exact same setup that the authors of dockstring have used in their basic tutorial
# which was to use the DRD2 (dopamine receptor D2) target protein from the PDB
target_id = "DRD2"
target = ds.load_target(target_id)
Now we can test our example molecule’s docking score:
[7]:
score, aux = target.dock(mol.to_smiles())
print(score)
/Users/noahhk/anaconda3/envs/glyco2/lib/python3.11/site-packages/dockstring/utils.py:77: DockstringWarning: Although Mac use is supported, docking scores on Mac do not always perfectly match scores from Linux. Therefore, extra care should be taken when comparing results to other platforms. In particular, the baselines in the DOCKSTRING paper were computed on Linux, so please do not directly compare your docking scores to the scores reported on the paper.
  warnings.warn(
-7.4
In fact, dockstring even provides us with an RDKit molecule for the algined ligand which can be found in the aux dictionary. It actually contains 10 conformers that were evaluated, we are only interested in the best one (which is the first one):
[8]:
def get_ligand(rdkit_ligand):
    # remove the other conformers (since we cannot import multi-conformer RDKit molecules directly into BuildAMol)
    conf = rdkit_ligand.GetConformer(0)
    for i in range(1, 10):
        rdkit_ligand.RemoveConformer(i)

    ligand = bam.Molecule.from_rdkit(rdkit_ligand)
    return ligand

aligned = get_ligand(aux["ligand"])
aligned.py3dmol().show()
You appear to be running in JupyterLab (or JavaScript failed to load for some other reason). You need to install the 3dmol extension:
jupyter labextension install jupyterlab_3dmol
Making a pipeline#
Okey, now that we know that everything works we can start to actually design a pipeline that will actually put all the pieces together in order to generate some possible ligands. Since this tutorial should illustrate the general workflow and provide some inspiration rather than present a full-fledged finished product, we will not be implementing anything overly fancy. We will simply write a scoring function to make and dock a molecule using dockstring and then pass that to
scipy.optimize.minimize and see what happens… Ideally we would like to have multiple candidate ligands, so we will run our pipeline a few times to get some hits…
[9]:
from warnings import filterwarnings
filterwarnings("ignore")
ds.setup_logger(level="ERROR")

# let's try to find a ligand from 4 fragments
n_fragments = 4
starting = sampler.random(n_fragments)

# we will set up a dictionary that allows us to store a few more of the "best" ligands along the way...
metadata = {"best_score" : np.inf, "ligand" : None}

# we define our scoring function that will evaluate the ligand
def score(matrix):
    # we need to reshape since the matrix is 2D but the optimizer will pass it as a 1D array
    matrix = matrix.reshape(starting.shape).astype(int)

    # we use try-except since we cannot be sure that the matrix will be valid at all times
    try:
        smiles = sampler.make_molecule(matrix).to_smiles()
        score, aux = target.dock(smiles)
        new_best = min(metadata["best_score"], score)
        if score == new_best:
            metadata["best_score"] = score
            metadata["ligand"] = aux["ligand"]
        return score
    except:
        return np.inf
We can now test out if we can “optimize” for a ligand here with our scoring function. Let’s see if we get an output…
[19]:
from scipy import optimize
# we will use the Nelder-Mead method since it is simple and does not require gradients
# and we will do only a small test-run with 5 iterations
out = optimize.minimize(score, starting.flatten(), method="Nelder-Mead", options={"maxiter" : 5})

# the results should be stored in the metadata dictionary now
print(metadata["best_score"])
ligand = get_ligand(metadata["ligand"])
ligand.to_pdb("./files/DRD2_ligand.pdb")
ligand.py3dmol().show()
-11.6
You appear to be running in JupyterLab (or JavaScript failed to load for some other reason). You need to install the 3dmol extension:
jupyter labextension install jupyterlab_3dmol
And let’s also check out the ligand and protein together:
[21]:
# we will use Py3DMol to visualize the protein and ligand together
import py3Dmol as p3d

def show_ligand_and_protein(ligand):
    view = p3d.view(width=800, height=600)

    # add the protein
    view.addModels(open("./files/DRD2.pdb").read(), "pdb")
    view.setStyle({"model": 0}, {"cartoon": {}})
    view.addSurface(None, {"opacity" : 1, "color": "lightgray"})

    # add the ligand
    # (we have to get the PDB-text for Py3DMol)
    pdb = bam.utils.pdb.encode_pdb(ligand)
    view.addModels(pdb, "pdb")
    view.setStyle({"model": 1}, {"stick": {"color" : "cyan"}})
    view.zoomTo()
    view.show()

show_ligand_and_protein(ligand)
You appear to be running in JupyterLab (or JavaScript failed to load for some other reason). You need to install the 3dmol extension:
jupyter labextension install jupyterlab_3dmol
Okey, cool, there is a molecule in the pocket where Risperidone is supposed to bind! Now that we have a system that appears to be working we can think of turning it into a simple “screening” tool of sorts, by for instance, simply repeatedly running the procedure above from random starting ligands. Below is some example code that would do the trick. The code is super inefficient though since we are running each optimization sequentially, any real application of this kind should definitely use a parallel approach here!
[22]:
# how many times we will run the procedure
n_runs = 2

# define a function that will run the optimization
# (this is super down-scaled of course, so we don't have to wait so long...)
def _run(i):
    starting = sampler.random(n_fragments)
    metadata["best_score"] = np.inf
    metadata["ligand"] = None

    out = optimize.minimize(score, starting.flatten(), method="Nelder-Mead", options={"maxiter" : 1})

    print(f"Run {i+1} done with score {out.fun}")
    results.append(dict(metadata))
    return results[-1]

results = [_run(i) for i in range(n_runs)]
Run 1 done with score -8.9
Run 2 done with score -8.3
We can inspect the ligands that were produces:
[25]:
import matplotlib.pyplot as plt

ligands = [get_ligand(i["ligand"]) for i in results]
fig, axs = plt.subplots(2, len(ligands) // 2, figsize=(8, 5))

# draw all ligands
for idx, l in enumerate(ligands):
    if l is not None:
        ax = axs.flat[idx]
        ax.imshow(l.chem2dview().draw())
        ax.axis("off")
        ax.set_title(f"Score: {results[idx]['best_score']:.2f}")
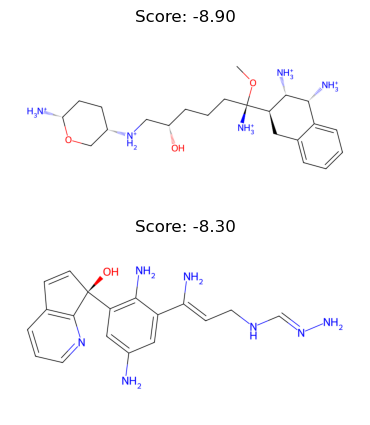
Okey, cool! And just like this we have got some new candidate ligands! Of course, this entire example is not a fully developed ligand screening pipeline, it’s just a toy example, but it’s still quite nice to see that it works and with a relatively moderate amount of code too!
Let’s end this tutorial by visualizing the two other ligands that we just made also with the protein:
[26]:
show_ligand_and_protein(ligands[0])
show_ligand_and_protein(ligands[1])
You appear to be running in JupyterLab (or JavaScript failed to load for some other reason). You need to install the 3dmol extension:
jupyter labextension install jupyterlab_3dmol
You appear to be running in JupyterLab (or JavaScript failed to load for some other reason). You need to install the 3dmol extension:
jupyter labextension install jupyterlab_3dmol
Alrighty, that seems interesting all ligands are binding at the same pocket, which is nice since this is also the place where a drug named Risperidone is known to bind. The molecules are, of course, not Risperidone, however, which actually looks like this:
[27]:
risperidone = bam.molecule("Risperidone")
risperidone.chem2dview().draw()
[12:56:50] SMILES Parse Error: syntax error while parsing: Risperidone
[12:56:50] SMILES Parse Error: Failed parsing SMILES 'Risperidone' for input: 'Risperidone'
[27]:
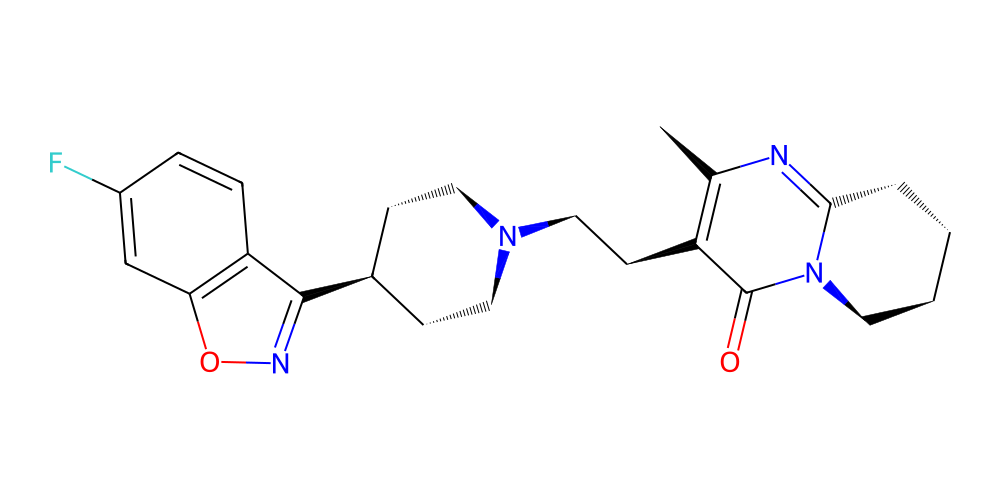
Still, our ligands do at least share some common structural features with Risperidone, which is encouraging given how incredibly simple our pipeline actually was and how small-scale the optimization was!
And with that we have reached the end of this tutorial. Hopefully you now feel a little inspired for making your own molecule design pipeline with the help of BuildAMol! Thanks for checking out this tutorial and good luck with your research!